3D Google Cardboard
In a previous post I showed how a scene could be displayed in a browser and viewed stereoscopicly with Google Cardboard. This post describes a more efficient means of creating the display. In both cases, the browser screen is split in half with slightly different viewpoints so the eyes/brain combination views the result with depth.
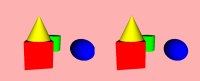
The previous case created two renderings of the same 3D scene using a slightly offset viewpoint. That used twice as much system resources as displaying a single view. This version works from a single 3D scene that is rendered to two separate textures. This code is available online either as a stereoscopic display or source code.
I am going to call this version the StereoscopicGL renderer as it directly uses WebGL to create the left/right textures.
The basic structure of the scene is:
+- Group - id='unrendered'
+--- Transform - for motion
+----- Model
+
+- Group - id='left_eye'
+--- Appearance
+----- Rendered Texture from above
+--- Geometry - plane
+
+- Group - id='right_eye'
+--- Appearance
+----- Rendered Texture from above
+--- Geometry - plane
Each Group will be examined separately. The first group (id='unrendered') uses an X3DOM extension to prevent rendering of the children. A value of false in the render attribute to the Group element indicates not to render any children. It is important to DEFine the element containing the model because it is used in the rendering process. The interior Transform handles the motion of the mobile device. The model in Inlined to keep this code more compact.
<group id='unrendered_scene' render='false'>
  <group DEF='scene'>
    <transform DEF='Viewpoint-alpha' id='x3d_viewpoint_alpha'>
      <Inline url='stereo.x3d'></Inline>
    </transform>
  </group>
</group>
The rendering to texture is done for each eye separately. The code is nearly the same except for some differences as to placement of the result and indicators for left/right side. Most of the discussion will center of the left-eye rendering.
The rendering part is to define the shape with geometry (plane - X3DOM extension) and appearance. There is also a Background node to provide something besides a black display region. The Apperance includes the texture (RenderedTexture), Viewpoint (for the rendering operation), and the previous definition of the scene. The code snippet below shows the basics of the Shape node without the WebGL shader code.
<shape>
  <appearance>
    <renderedTexture id='rtLeft' stereoMode='LEFT_EYE' update='ALWAYS'
                     interpupillaryDistance='0.3'
                     dimensions='640 720 4' repeatS='false' repeatT='false'>");
      <viewpoint USE='viewpoint' containerField='viewpoint'></viewpoint>
      <background USE='bgnd' containerField='background'></background>
      <group USE='scene' containerField="scene"></group>
    </renderedTexture>
    <ComposedShader> <!-- Described Below --> </ComposedShader>
  </appearance>
  <plane solid="false"></plane>
</shape>
The ComposedShader node contains the code for creating the left-eye/right-eye textures. There are slight differences between the left-eye and right-eye code to account for the eye-separation. Each eye-shader has two parts - a Vertex part and a Fragment part. The Fragment part is the same for either eye. The code below shows the entire shader for the left eye.
<composedShader>
  <field name='tex' type='SFInt32' value='0'></field>
  <field name='leftEye' type='SFFloat' value='1'></field>
  <shaderPart type='VERTEX'>
    attribute vec3 position;
    attribute vec2 texcoord;
    uniform mat4 modelViewProjectionMatrix;
    varying vec2 fragTexCoord;
    void main()
    {
      vec2 pos = sign(position.xy);
      fragTexCoord = texcoord;
      gl_Position = vec4((pos.x/2.0)-0.5, pos.y, 0.0, 1.0);
    }
  </shaderPart>
  <shaderPart DEF="frag" type='FRAGMENT'>
    #ifdef GL_ES
    precision highp float;
    #endif
    uniform sampler2D tex;
    uniform float leftEye;
    varying vec2 fragTexCoord;
    void main()
    {
      gl_FragColor = texture2D(tex, fragTexCoord);
    }
  </shaderPart>
</composedShader>
The right-eye code is esentially the same with the differnce being the calculation of gl_Position.
<composedShader>
  <field name='tex' type='SFInt32' value='0'></field>
  <field name='leftEye' type='SFFloat' value='0'></field>
  <shaderPart type='VERTEX'>
    attribute vec3 position;
    attribute vec2 texcoord;
    uniform mat4 modelViewProjectionMatrix;
    varying vec2 fragTexCoord;
    void main()
    {
      vec2 pos = sign(position.xy);
      fragTexCoord = texcoord;
      gl_Position = vec4((pos.x + 1.0)/2.0, pos.y, 0.0, 1.0);
    }
  </shaderPart>
  <shaderPart USE="frag" type='FRAGMENT'>
  </shaderPart>
</composedShader>
Just making small changes for a different model (Viewpoint and Inline), the Kelpie can also be displayed.
This X3D/X3DOM code constructs a stereo display. It is still necessary to wrap it with the necessary JavaScript to handle device motion. That will be covered in a future post.